
DIY Peel And Stick Backsplash
This post may contain affiliate links. This means I may receive compensation when you click on links and actions are tracked by means of a code in the links.
How to install a DIY peel and stick backsplash with just a pair of scissors and a tape measure.
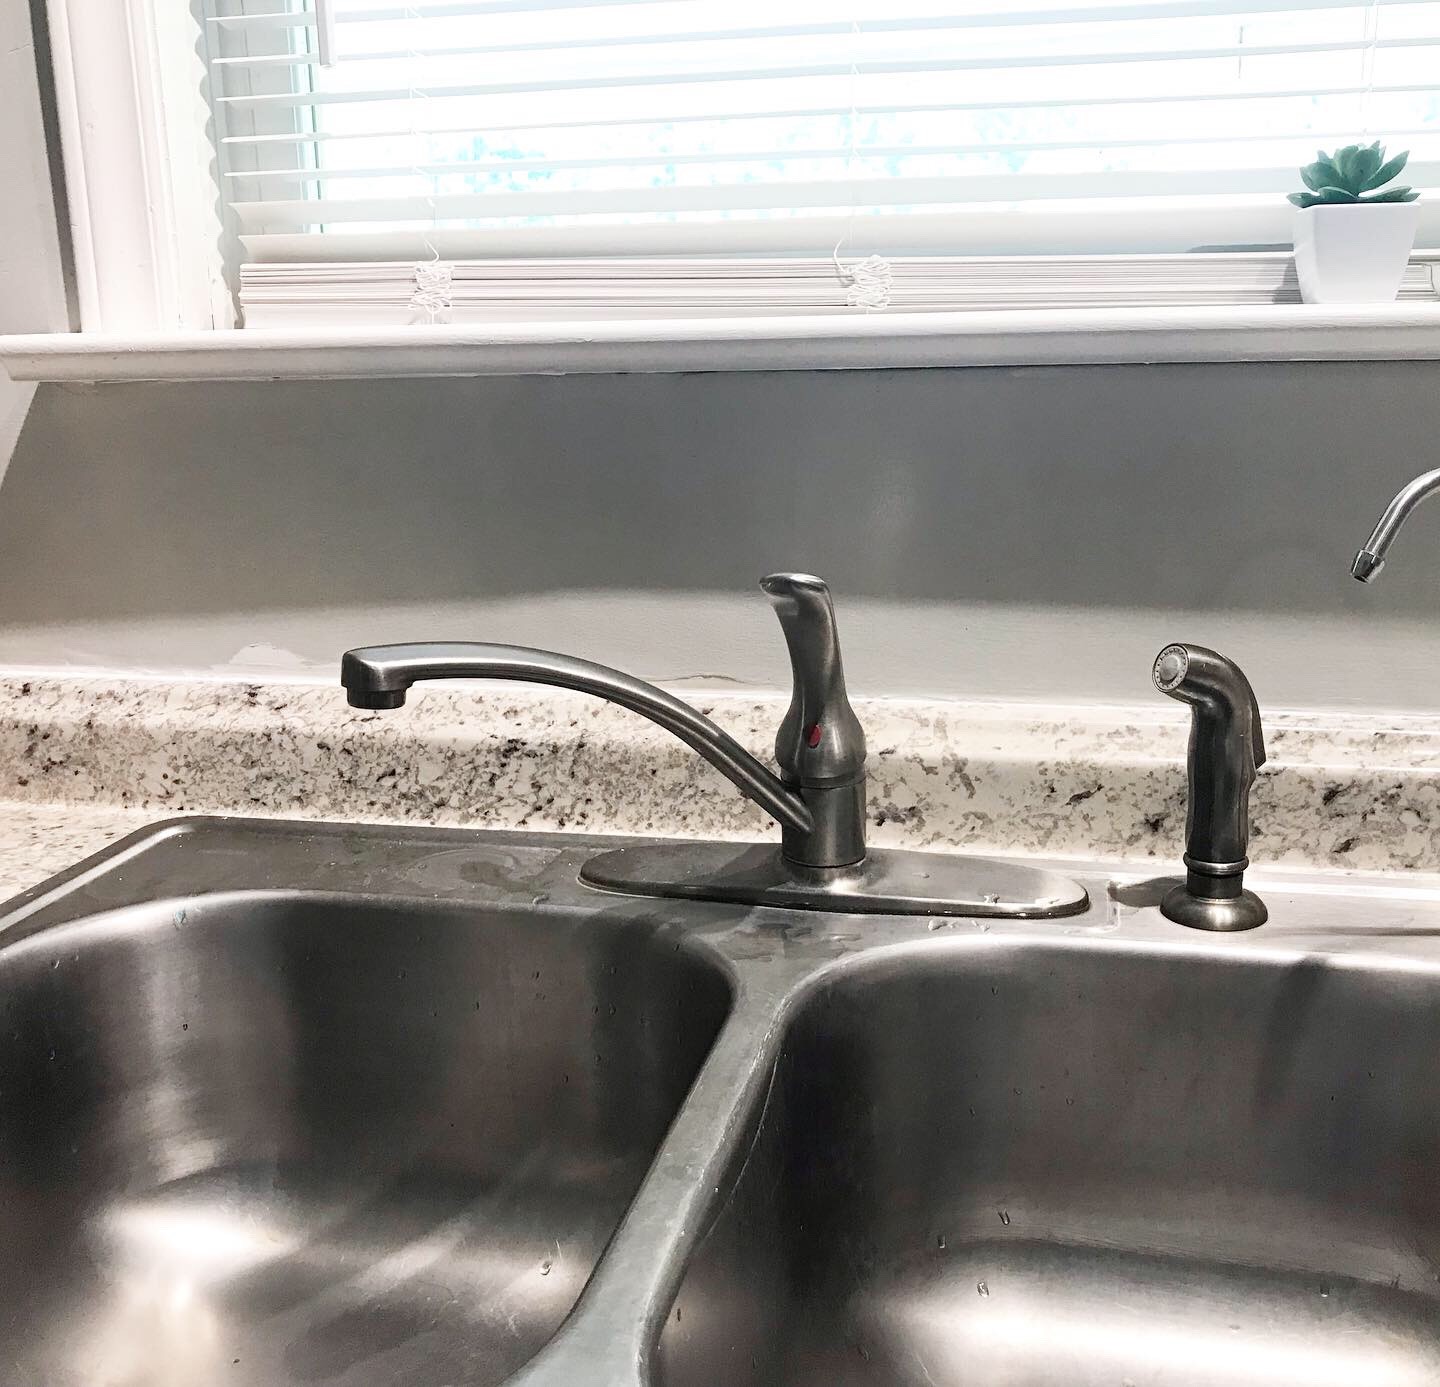
I have been wanting to put a backsplash up behind my kitchen sink for years. I was so tired of staring at the plain painted wall while I washed dishes.
However I definitely couldn’t do a real glass tile backsplash by myself and I was pretty sure I couldn’t afford anything that would look decent.
When I discovered affordable kitchen tile stickers I found hope. Maybe I could actually DIY my backsplash!
In this post, I’ll walk you through how to install a peel and stick backsplash yourself.
I was able to cover the space behind my sink for less than $50 with these amazing tiles and a pair of scissors… read on for my review!
Where Should My Peel and Stick Backsplash Go?
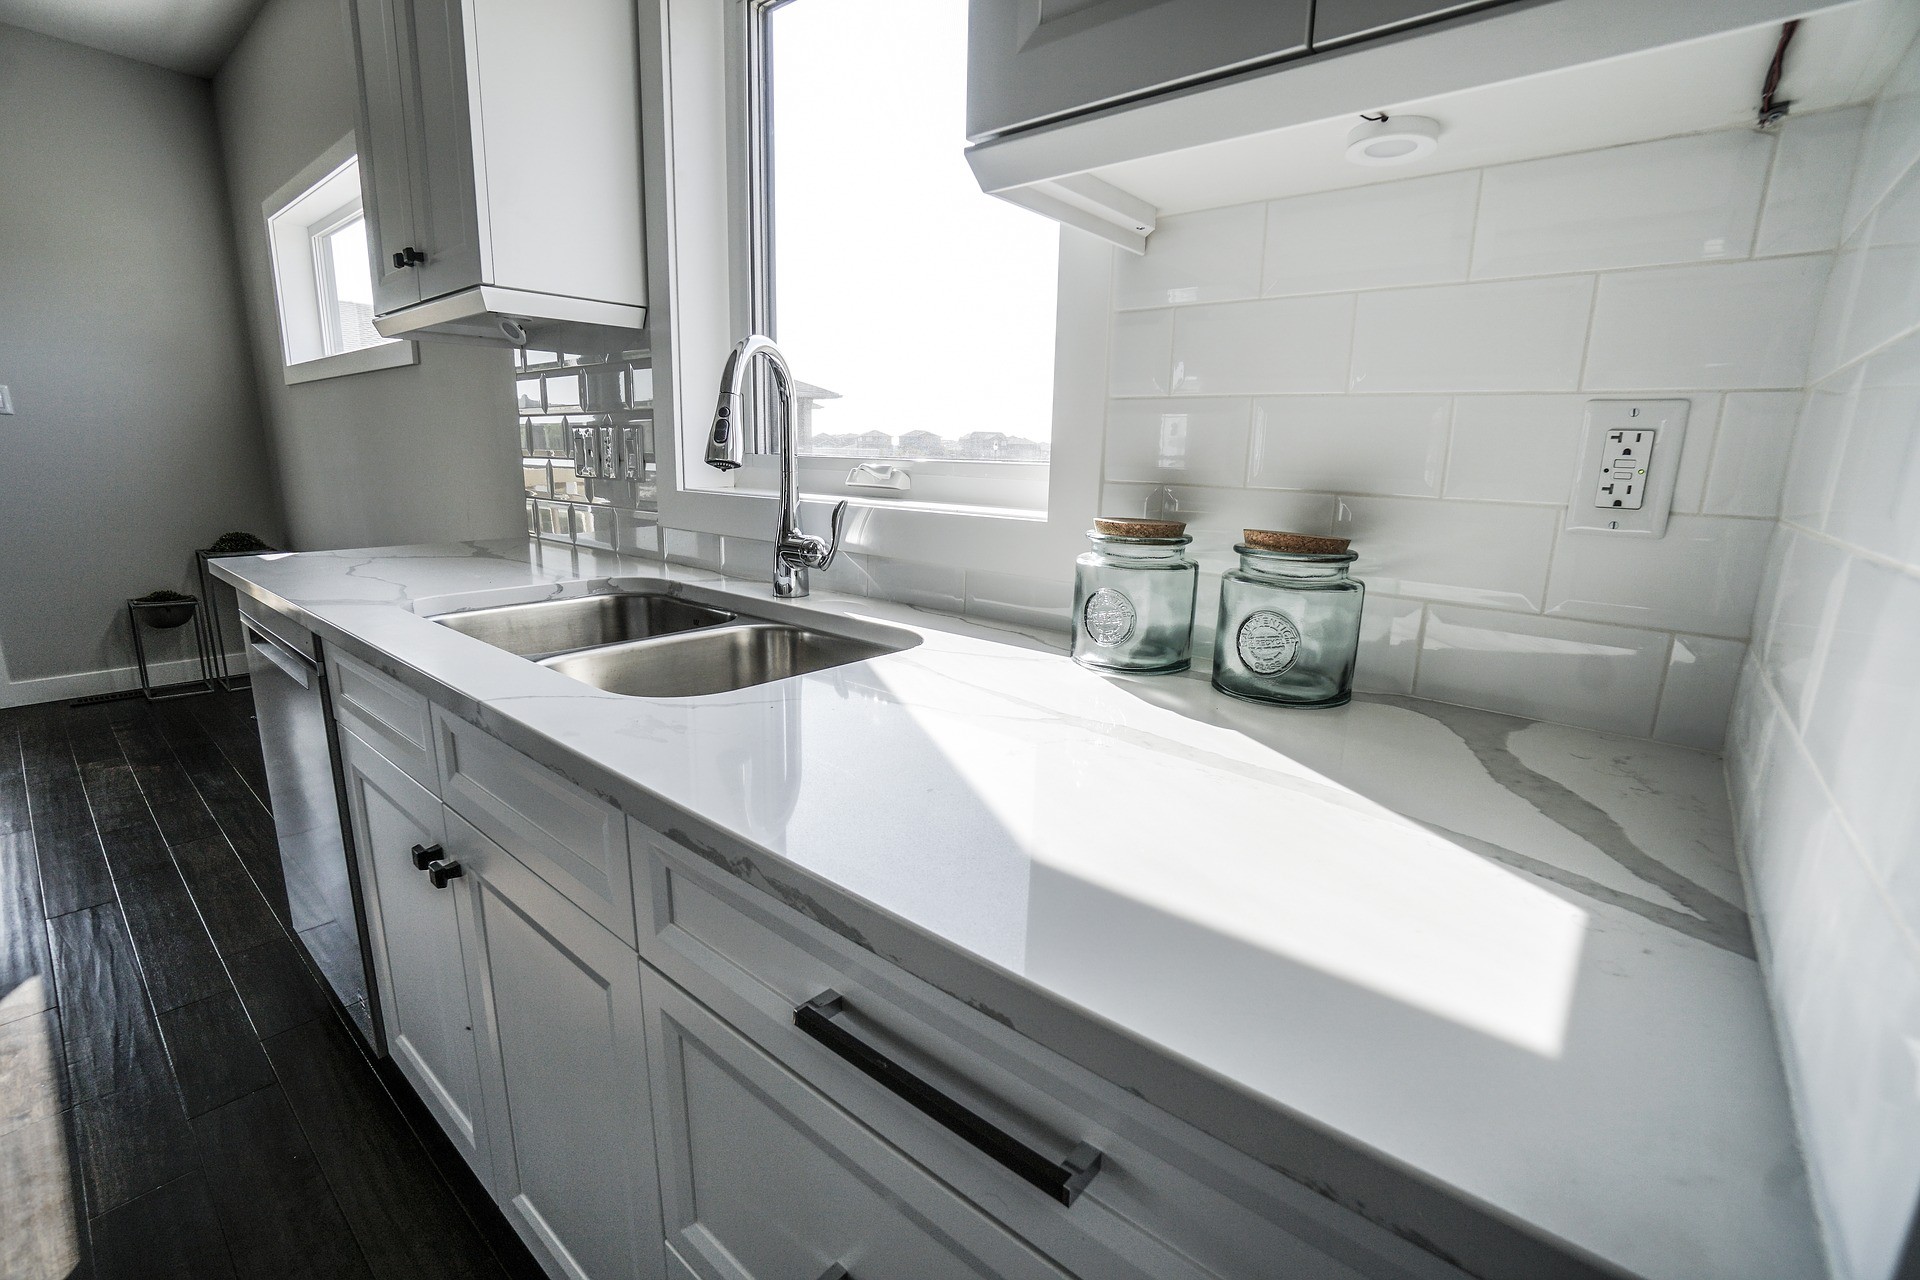
First you might be wondering (like I was) where exactly should a kitchen back splash begin and end?
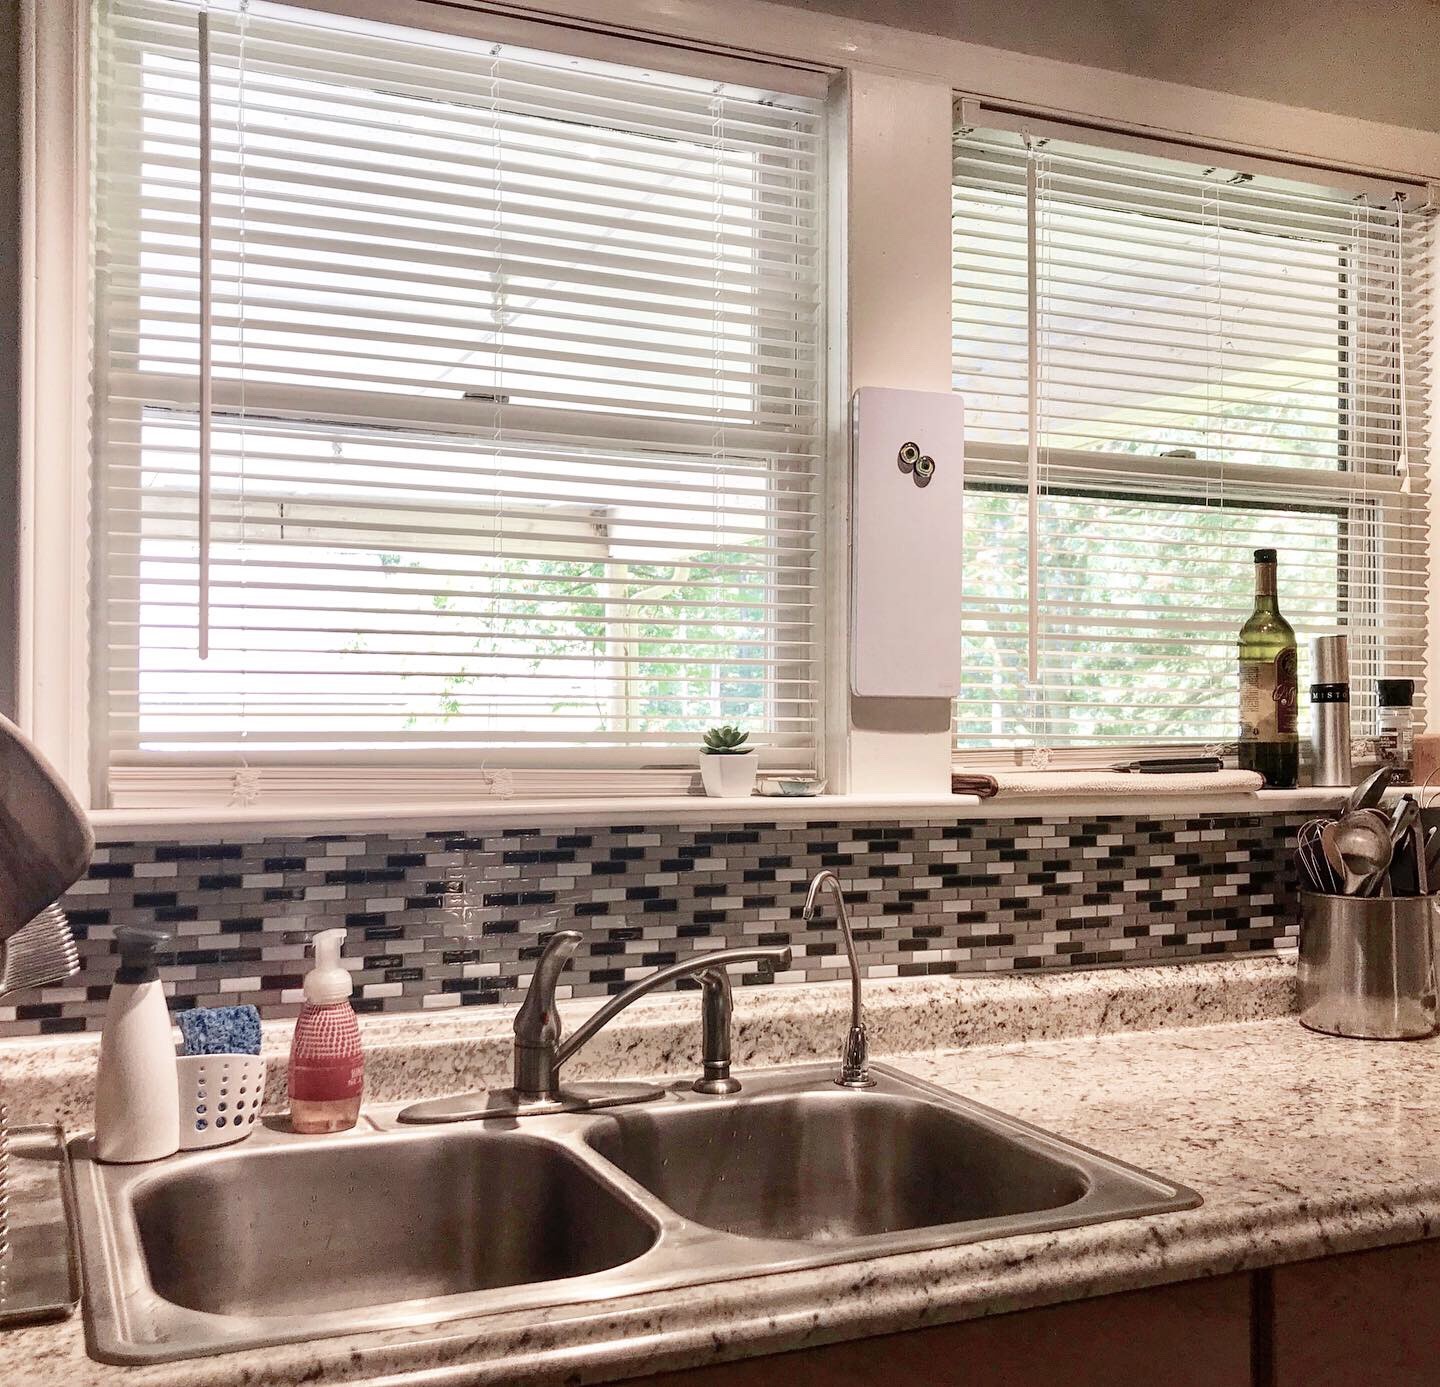
Well, I learned that typically a backsplash will extend along the length of a counter top and up to the bottom of the cabinets.
If you have tall cabinets then you will have a larger backsplash area to cover.
Reference the photo above for an example of a typical backsplash installation.
Measure Your Backsplash Space
First, you’ll want to measure the space you want to cover with your kitchen tile stickers.
You’ll want to measure in inches – how long and how tall.
I wanted to cover some ugly drywall and paint that kept peeling behind my sink. At first my plan was only to cover the area directly behind my sink.
But that looked so good that I ended up covering the whole front wall!
Finding The Right Kitchen Tile Stickers

I used the large Smart Tiles from Home Depot in Murano Metallic Black, Grey, and White. These are no longer available, but I found a similar peel and stick tile from Smart Tile here.
You can find all of the Smart Tile Home Depot carries here.
These particular tiles are 10.2 inches by 9.1 inches. You can use these measurements to determine how many tiles you need to order for the space you measured.
I suggest ordering an extra tile just in case you mess up with one (I did have to throw one away).
Ordering an extra 10% is recommended.
Preparing To Use Peel And Stick Glass Tile
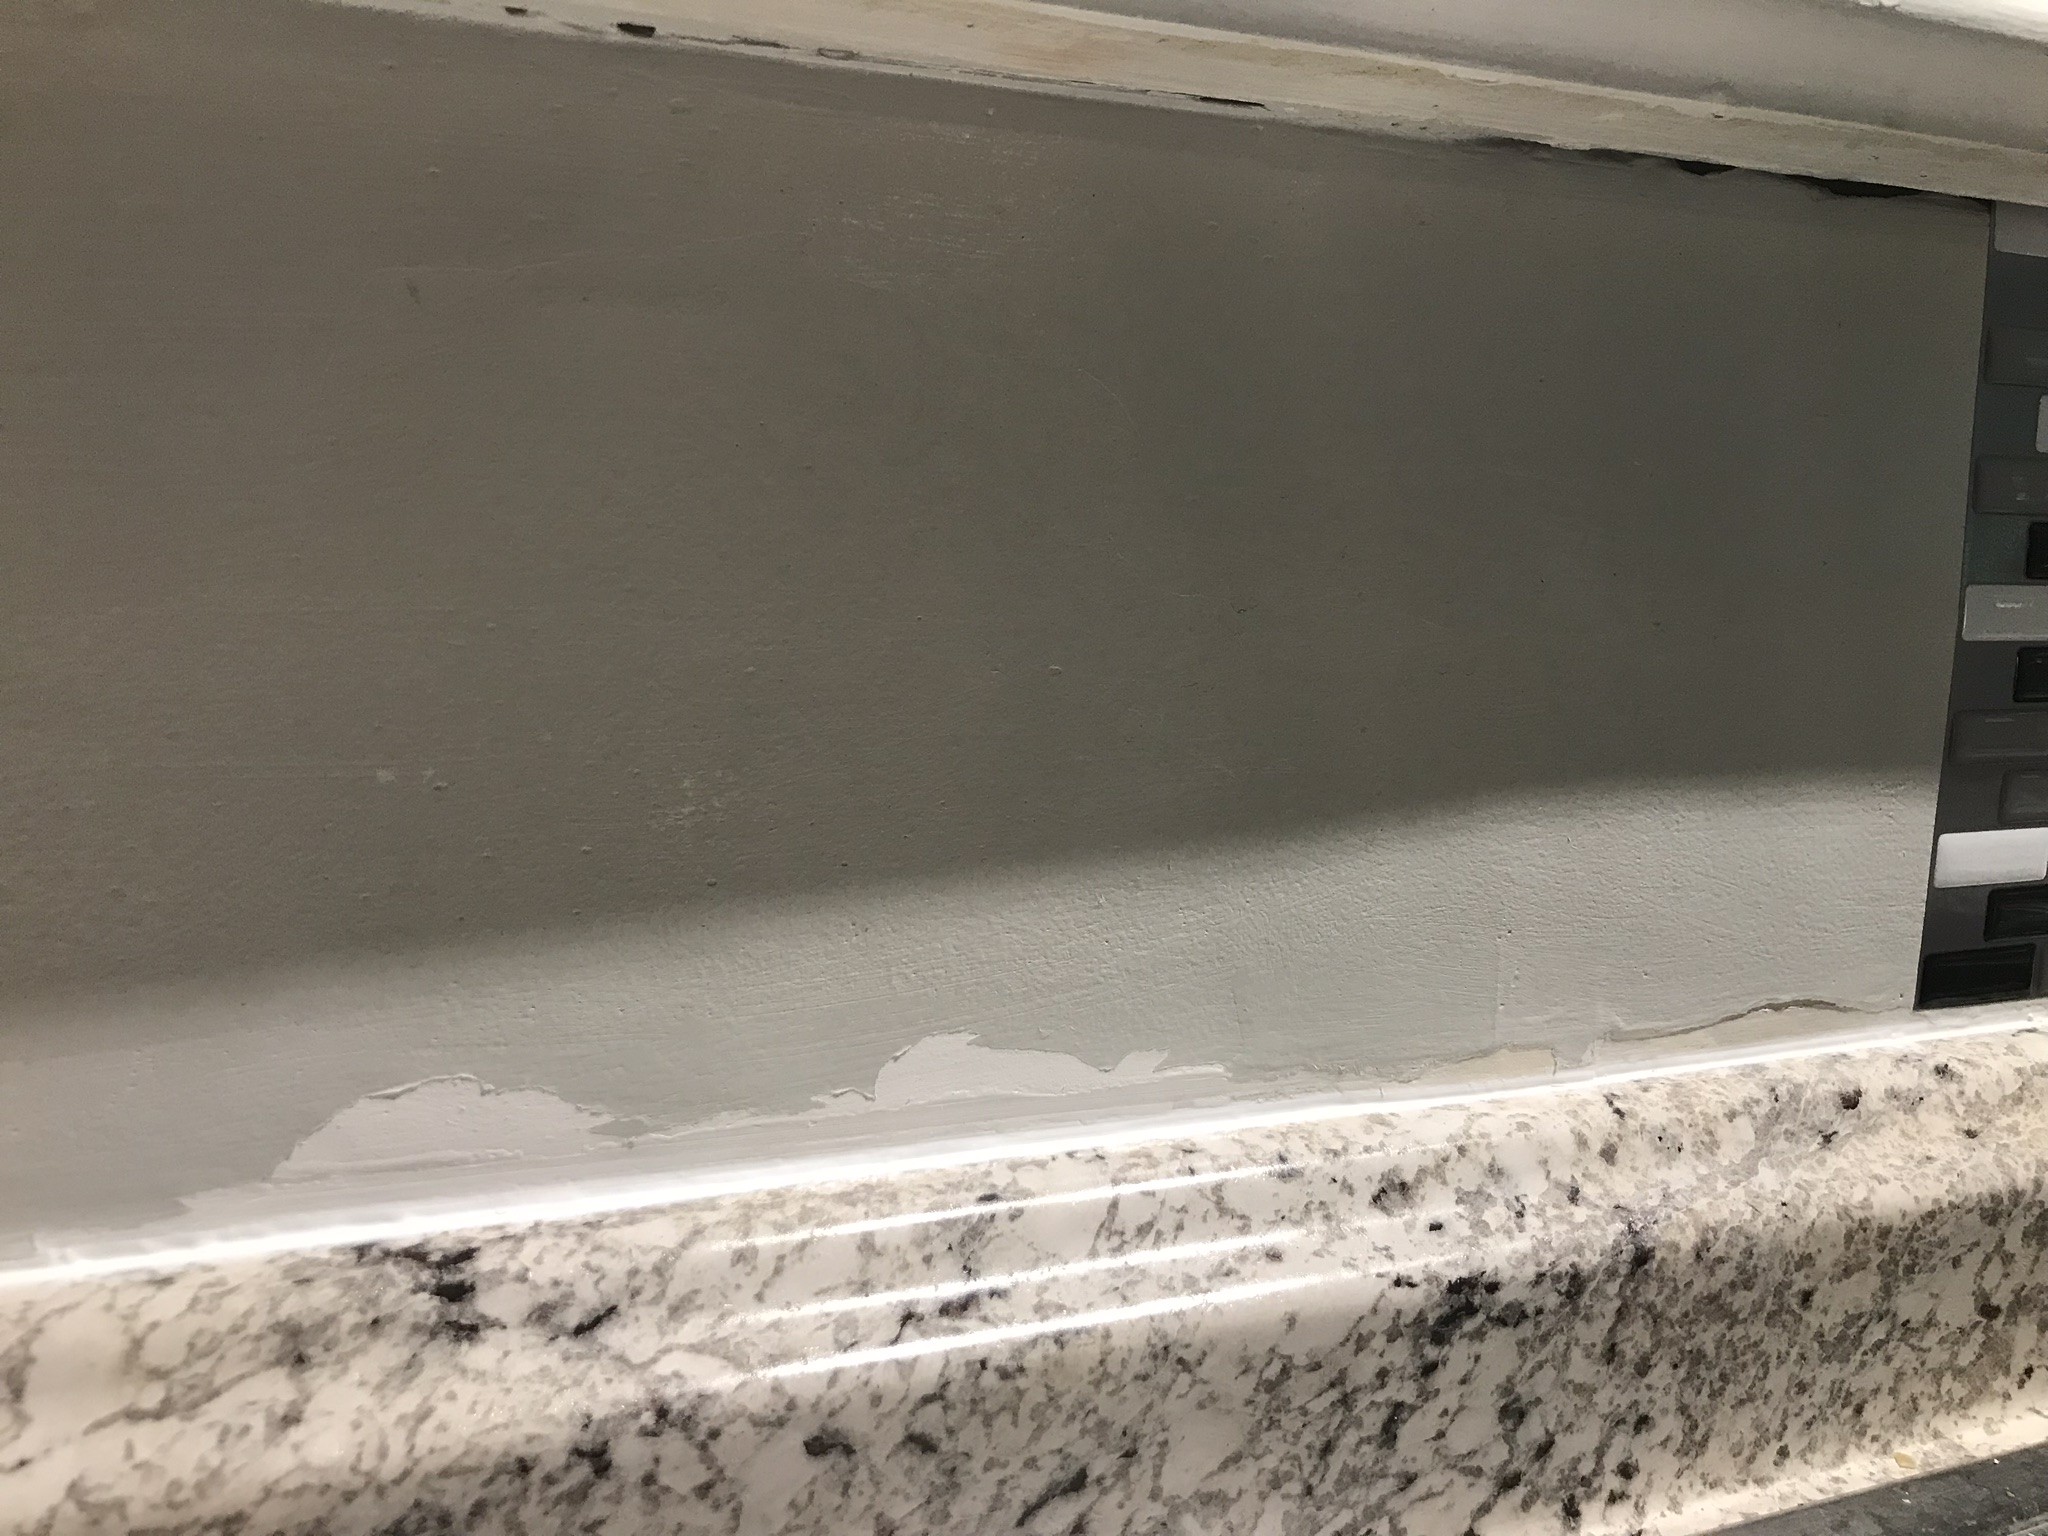
You will need to remove any peeling paint and dust from the surface to which you want to apply the tiles.
I had to pull some peeling paint off and wipe down the surface with a cloth.
There were a few grease spots I needed to clean as well with a standard household cleaner.
Apply Peel and Stick Backsplash Tile Stickers
Okay the BEST part about these particular kitchen tile stickers is this:
You can use scissors to cut them to the right size.
Yep, you don’t even need to use a box cutter as they suggest on the packaging – a sharp pair of heavy scissors will work just fine.
Measure how much you will have to cut off of the tiles and cut away.
When applying the tiles, I found it helpful to peel a bit away from the top first and line the tile up.
Then I’d press the tile on and pull the rest of the backing off. This made it much easier to work with!
The tiles are made to overlap and you can fit them together easily. One tile goes right on top of the other without any issue.
The tiles will fit like a puzzle when lined up properly. Take your time and be patient lining them up and the end result will be fantastic.
Work In One Direction Only
Start on one side of the area you want to cover with the backsplash and work in one direction.
I made a mistake and started on one side and then on the other. I forgot that they wouldn’t look right when they met in the middle, no matter what I did.
Rookie mistake!
Peel And Stick Backsplash Review
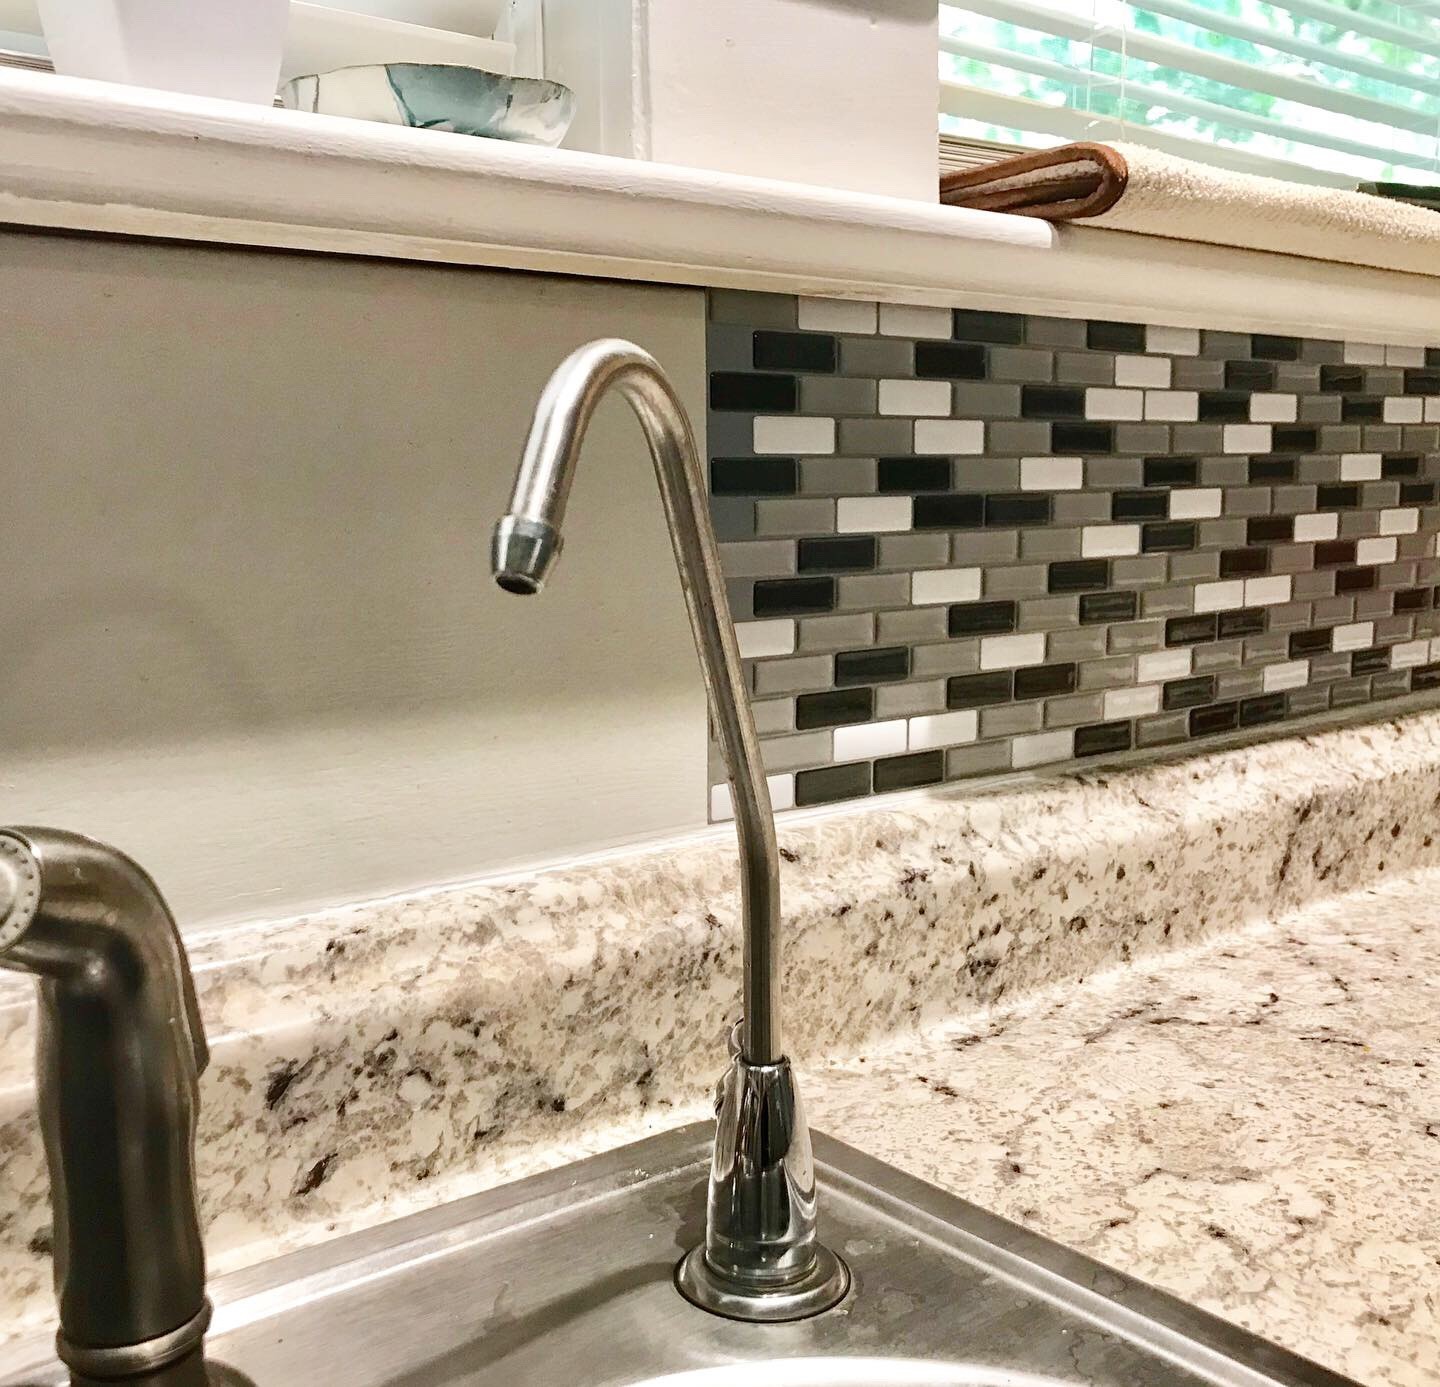
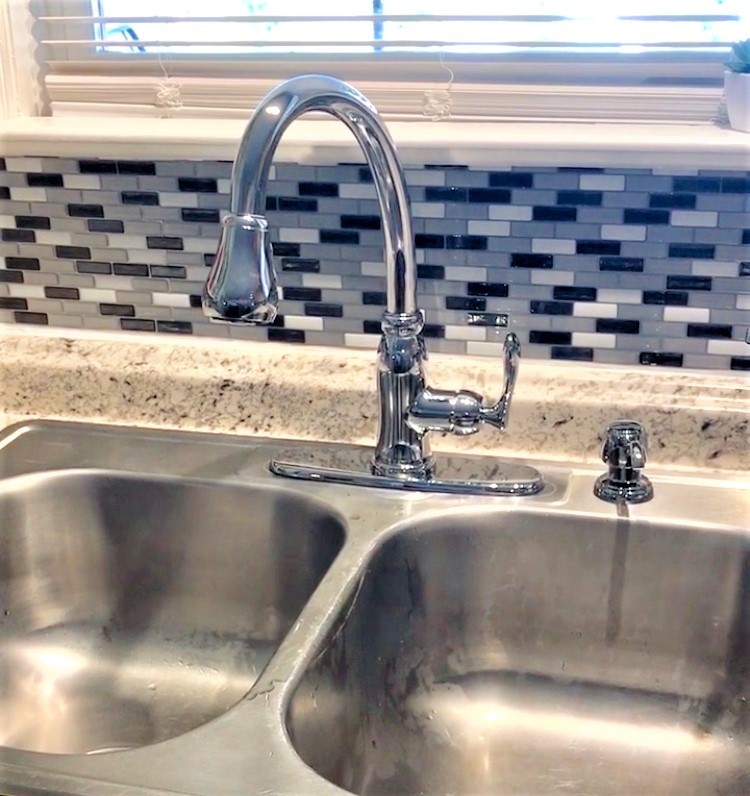
Here is my completed peel and stick glass tile backsplash.
It took me about two hours total to complete this DIY kitchen project with no tools except a pair of scissors and a tape measure.
I would highly recommend this product to anyone wanting to DIY their kitchen backsplash.
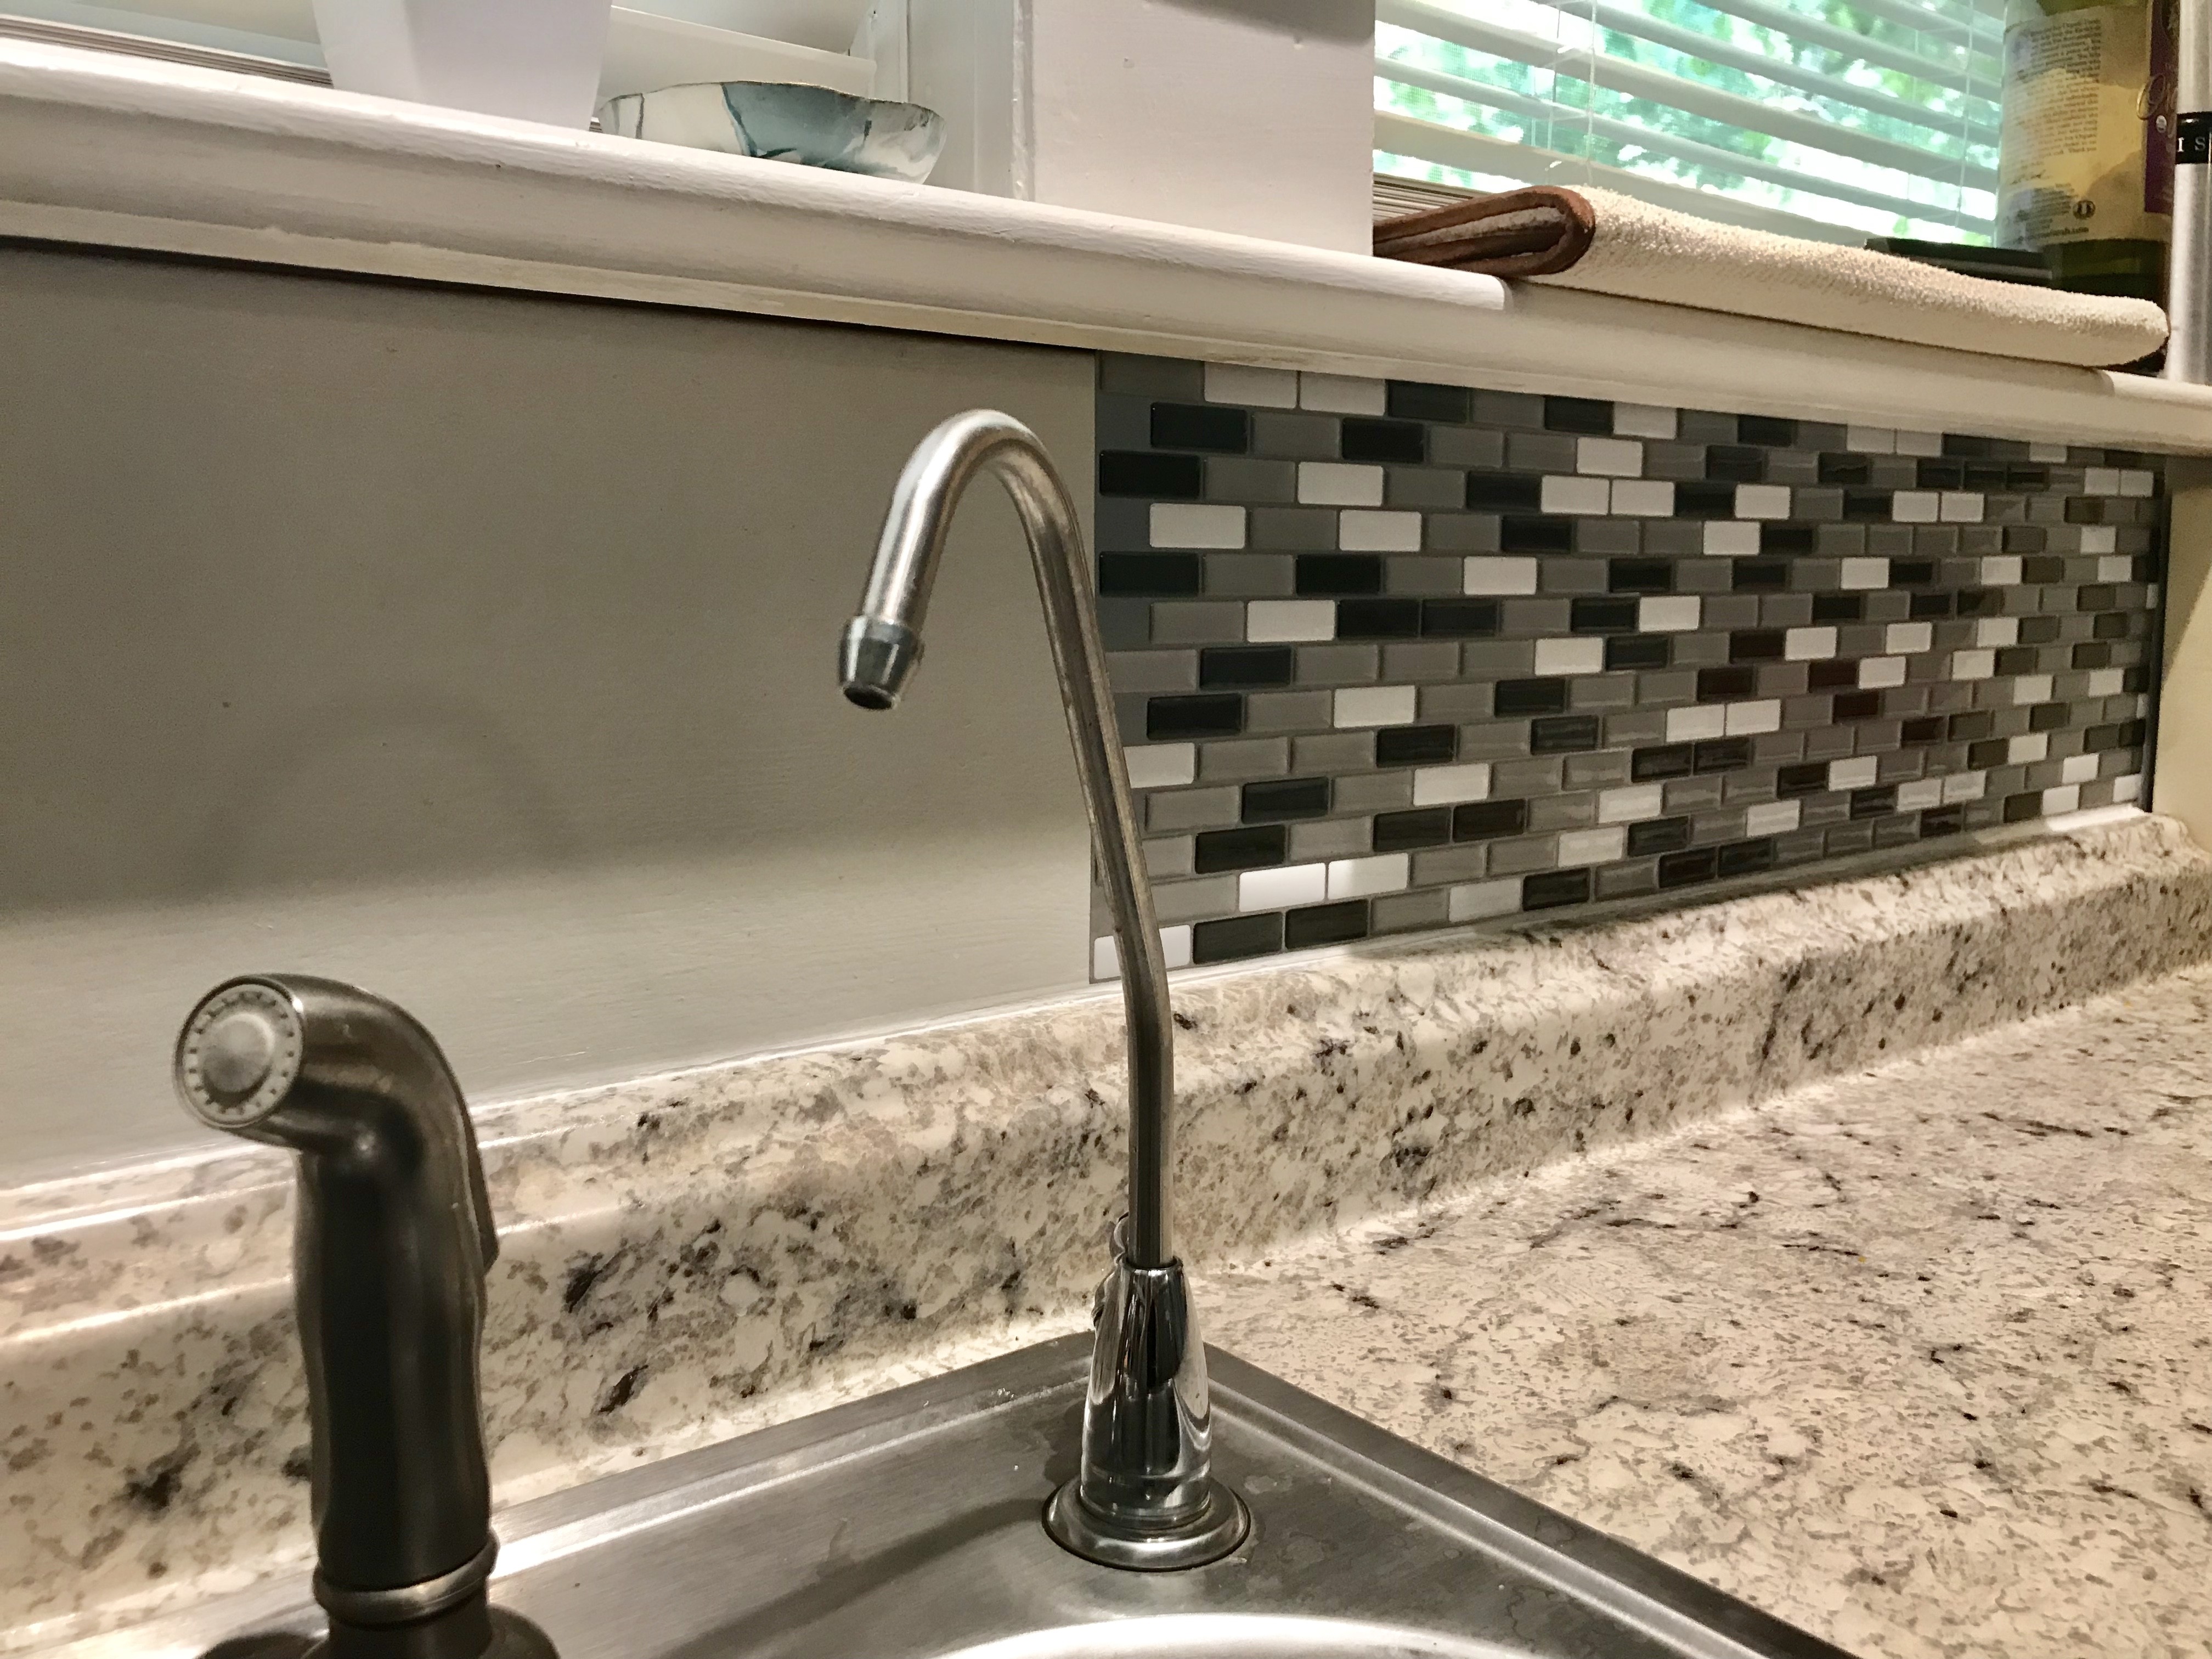
Here is a photo of the tiles a year later (with my new faucet) and I am happy to say they look the same as the day I put them in.
There’s no need to be concerned about durability or that they will come unstuck. They really hold up over time.
I’ve had lots of compliments on my backsplash. What do you think? Would you try a DIY peel and stick backsplash?
Looking for a way to DIY some pantry shleves? Click here for my post.
Leave a comment below with any questions!
Check out these other easy DIY projects:


Thanks a bunch this was super helpful…looks amazing
Can you put peel and stick tiles over wall text or wallpaper
As long as the wallpaper is very securely attached to the wall I think it would be fine.
I am definitely doing this project! Thank you for the tips. You dod a great job of explaining do’s and don’ts. I can’t wait to get started!!!
Thank you! I figured it was just a personal opinion on what looks best. I just didn’t know if there was a design rule of sorts…
Thank you!
My countertop extends about 5 to 6 inches past my cabinets….do I stop at the countertop or the cabinets?
Thanks
Hi Jenny! I think that is up to you and what looks best. I have an unconventional setup too so I just had to hold the tiles up and decide what I liked.
How many tiles did you use total?
I used 10.
Your wall should be very smooth–no texture at all is best; the tiles do not flex and will not stick adequately to the raised “bumps” of any texture. My walls have a very slight texture and I have made it work, barely; still need to press the tiles into the wall in places 2+ years later. The tiles have held up well; minimal cleaning has been required.
Awesome thanks so much for adding your experience Barbara!
Would you happen to know the countertop color?
I’m afraid I don’t. It is now four years old and I looked but can’t find the info anywhere!
Hello, I was wondering about the thickness of the tiles. I would have to go over a few electric outlets. I am wondering if I would need to adjust them if the tiles are thick enough that would not allow the outlet covers to be put on as is.
The tiles are quite thin so I think you would be fine putting the outlet covers over them.
Hi! I see you posted this in July last year, and I am wondering how you backsplash is holding up after nearly a year. I, too, want backsplash, but can’t do real tile right now, so I think peel and stick is going to be my choice, But I am wondering how it holds up over time! Would you do it again? Does it still look great? Thanks for any feedback! This initial post has given me hope that I may be able to have a backsplash afterall!
Hi Nancy! I am happy to report it holding up great. Even better than expected, actually. None of it has come loose and the tile itself looks like the day I bought it. Hope that helps.
Wondering if you had to go around any outlets and if so, was it difficult to do that?
I did not but it would be fairly easy – just measure and cut out the hole with scissors on the tiles.
Will it stick to ceramic tile ? I have an unfinished backsplash with no grout between each tile, am wondering if this could be used to cover that up . Looks great btw.
Hi Dawn! I definitely think they would stick to ceramic tile. The adhesive is quite strong. Good luck getting them off if you stick them on drywall lol.