
How to Make Homemade Yogurt
This post may contain affiliate links. This means I may receive compensation when you click on links and actions are tracked by means of a code in the links.
Step by step tutorial on how to make your own yogurt for 1/3 of the price of store bought yogurt! Homemade yogort is cheaper and just as delicious as store bought.

I love fancy organic yogurt but I can’t stomach the price tag. $6 for a quart of yogurt is just pure craziness to me!
I’ve learned how to make my own yogurt at home for less than 1/3 of the cost of store-bought organic yogurt, and it is SO GOOD!
Since there was a lot I had to learn before I made my first batch of homemade yogurt, I thought I would share the process to hopefully save y’all some time.
Homemade Yogurt Maker
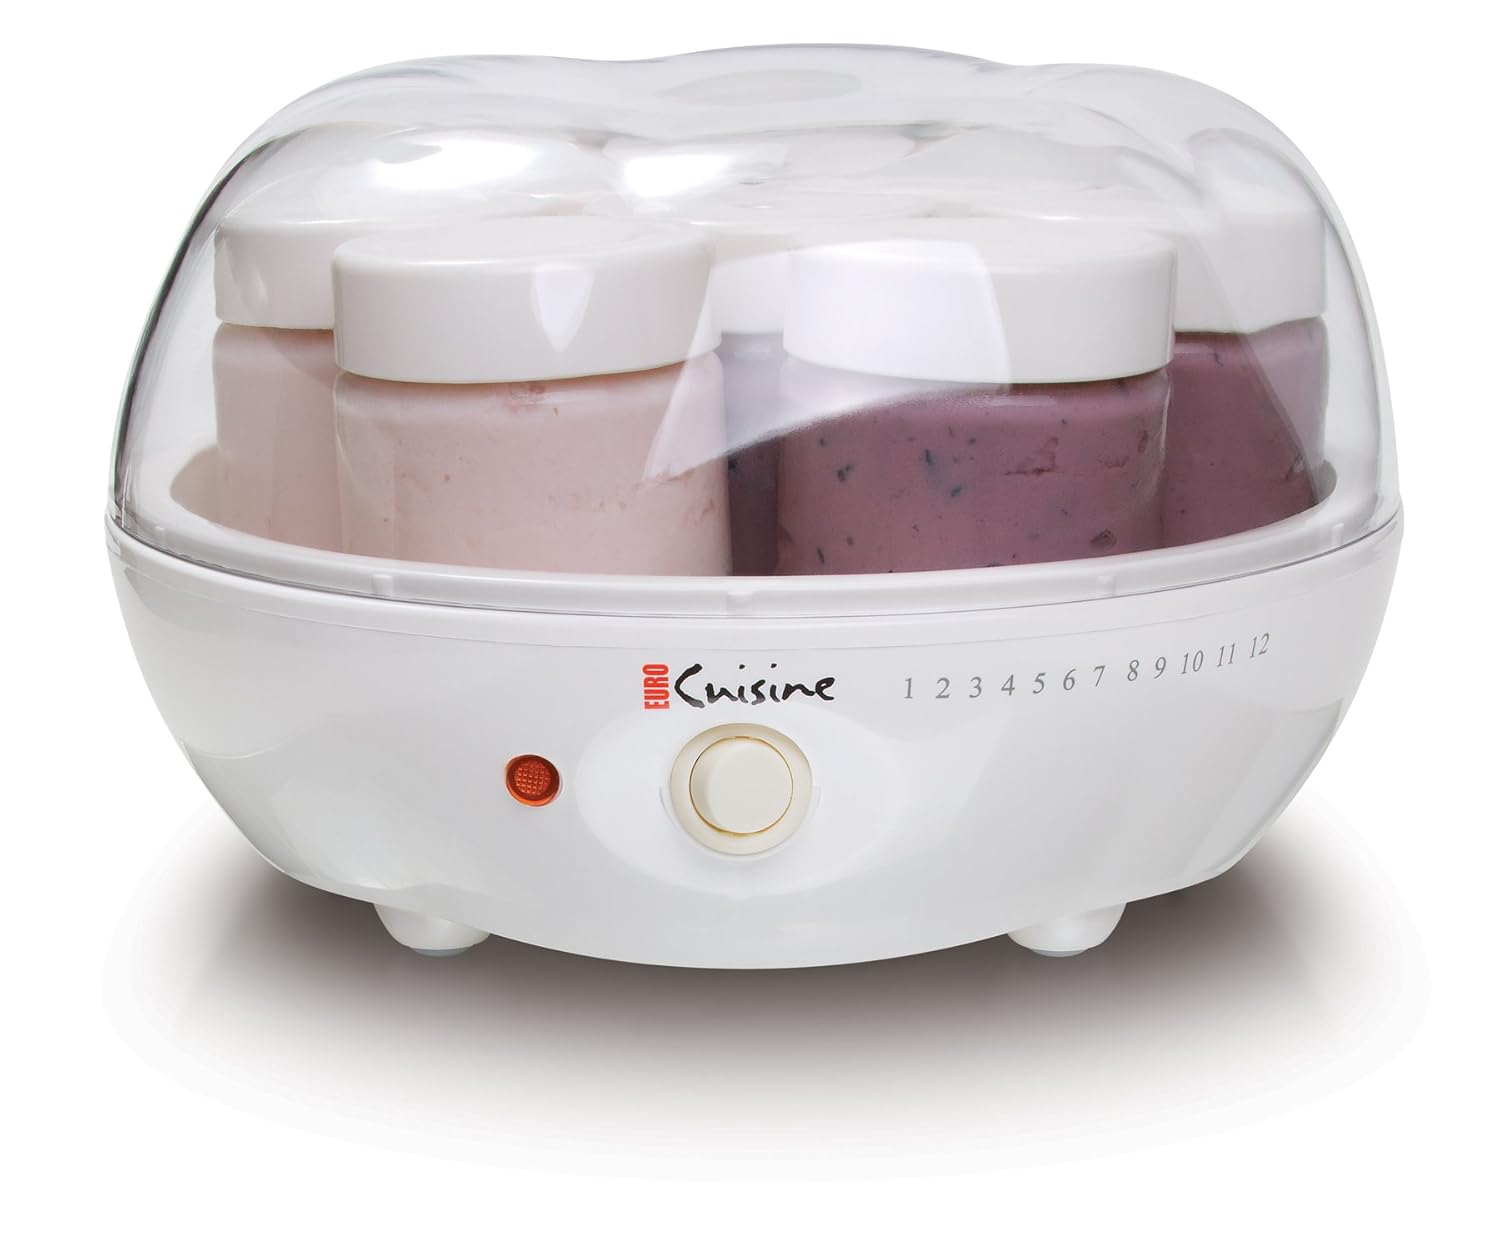
I use this Euro Cuisine Yogurt Maker and while it isn’t the fanciest one on the market, it works great and is usually around $25 on Amazon.
I really like that it has glass jars so I don’t have to worry about plastic compounds getting into the yogurt I am feeding to my little one.
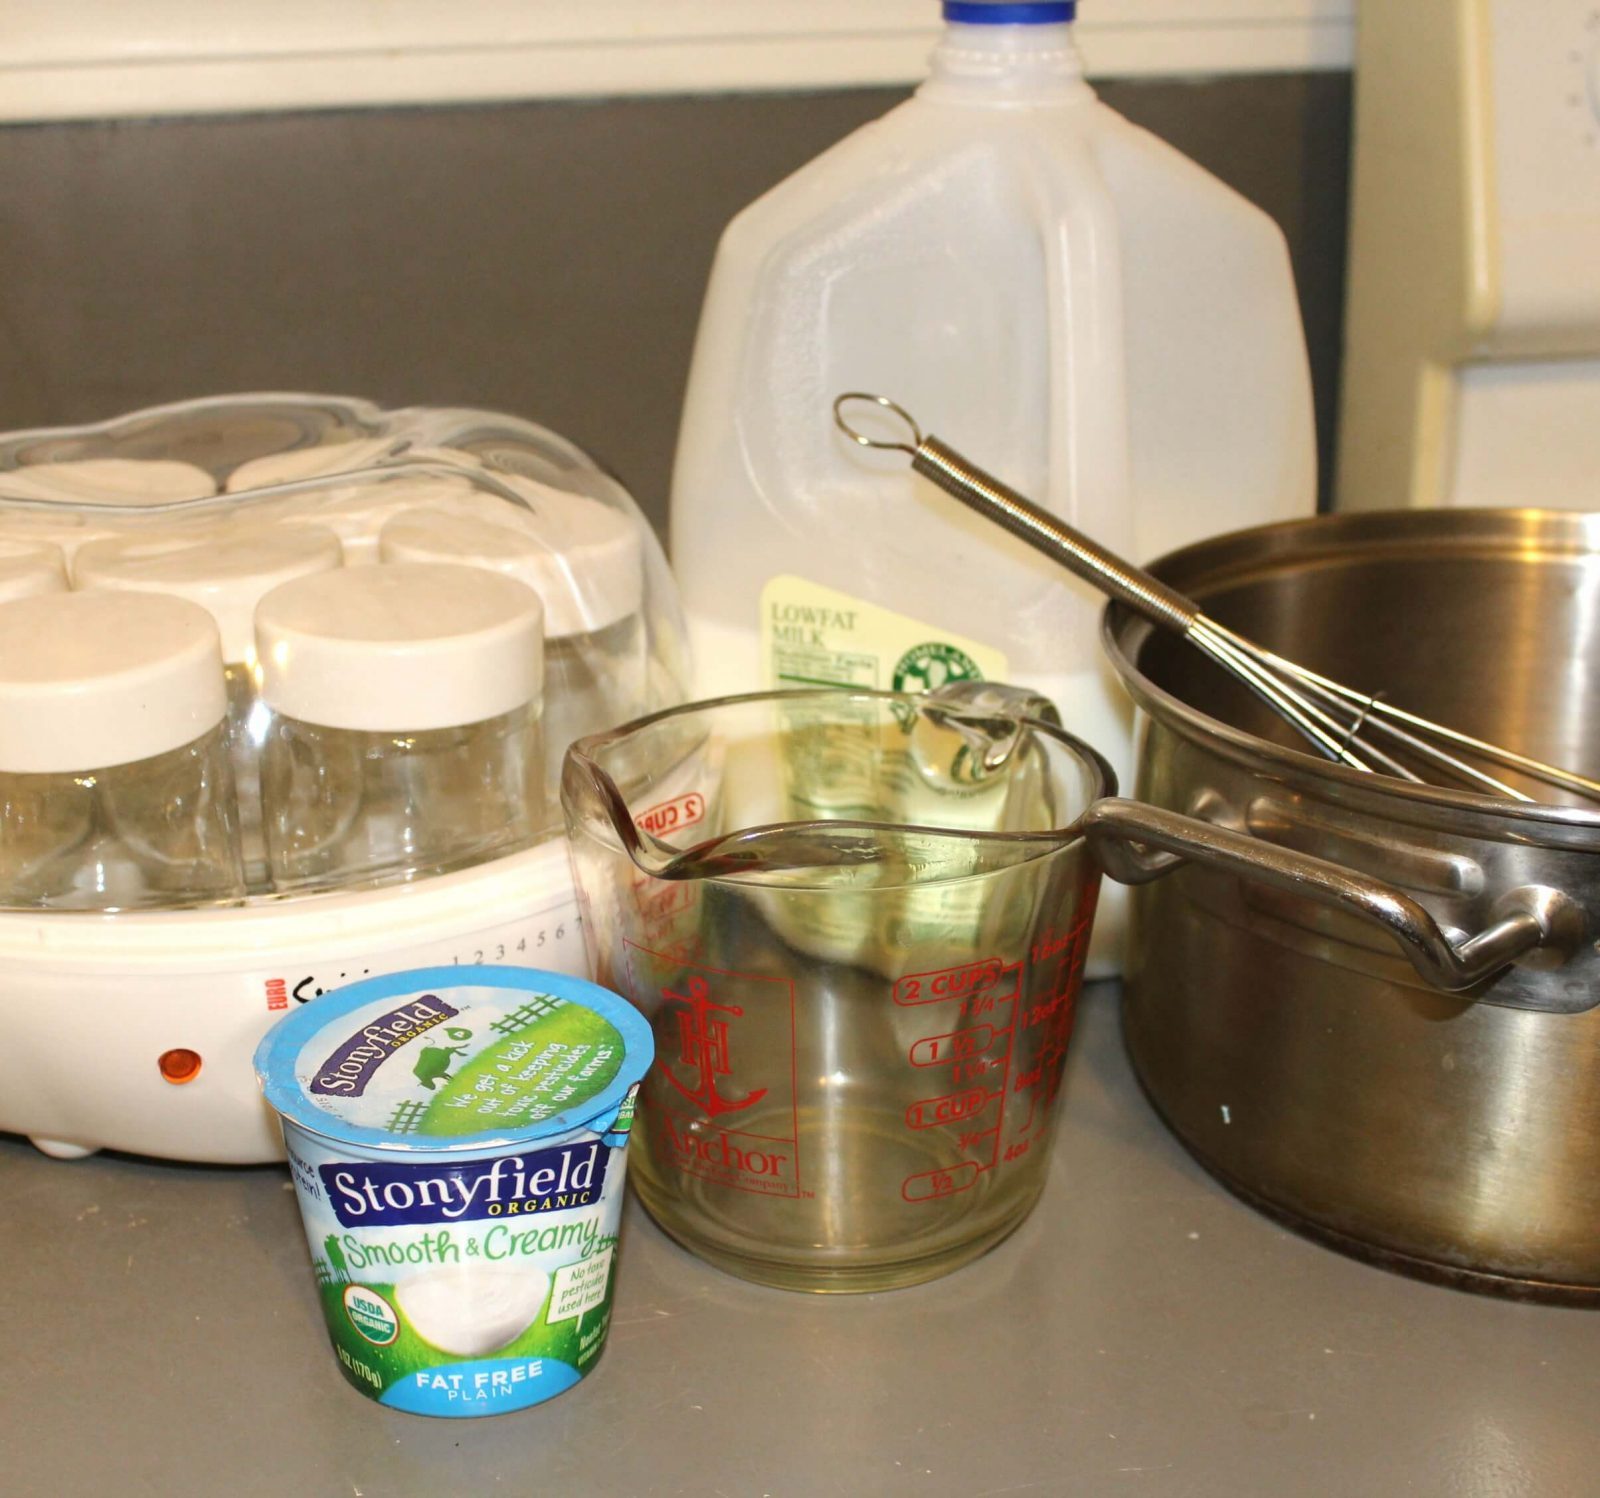
What Else You Need To Make Homemade Yogurt
In addition to the yogurt maker you’ll need some other supplies and ingredients. Here is a list of the equipment and ingredients you’ll need, which you likely already have hanging around your kitchen.
You’ll need:
- a meat or candy thermometer
- a whisk
- a large pot
- a large measuring cup
- a medium bowl
- milk
- a source of yogurt cultures (a small container of store-bought yogurt works fine)
So making yogurt (at least the kind most of us are used to) is basically just introducing some yogurt cultures to milk and then holding the milk at a temperature that allows to cultures to grow and work their fermentation magic for a period of time.
Depending on the type of milk you use, this is between 6 and 10 hours.
What Type of Milk Should I Use?
I make low-fat yogurt from 2% milk, but you can use skim, 1% or whole milk.
My yogurt maker manual says you can also use soy milk, but it must be UHT (shelf -stable) and must contain either fructose, honey or malt.
For a source of yogurt cultures, the easiest method is to buy a single serving of your favorite kind of yogurt and use that to make a few batches of homemade yogurt.
You should only use plain yogurt though, nothing flavored or sweetened.
I’ve read that different companies have different strains of yogurt-making bacteria that lead to different tastes and textures. I like the taste and texture of Stonyfield Farms yogurt so that’s what I have used.
One 6 oz. cup of store-bought yogurt can be used to make 42 oz. of yogurt and then one of those servings can be used to make another batch of yogurt.
After that, the cultures are weakened and you have to start over with a new source of cultures from a store-bought yogurt.
Some alternatives to this are using a freeze-dried yogurt starter or purchasing some heirloom cultures which can be reused indefinitely.
Making Your Yogurt
The first step in actually making the yogurt is to measure your milk into a large pot on the stove.
My yogurt maker can make seven 6 oz. jars of yogurt at a time (42 oz. total) and I will add 6 oz. of store-bought yogurt to the batch so I poured about 36 oz. of milk into my pot.
Then turn the burner on high and wait for the milk to start to gurgle and climb up the sides of the pot. For me, this takes between 5 and 7 minutes, so I do something else while I am waiting.

Next move the pot off of the burner, place your thermometer in the pot and go about your business.
The milk should be less than 100 degrees before you move on to the next step, and in my experience, this takes between 30 – 45 minutes. You don’t want the milk so hot that it kills the bacteria that you are about to introduce.
Next, add your starter yogurt to a medium size bowl and pour a little of the cooled-down boiled milk into the bowl with it.
Whisk them together until they are very smooth, then combine this mixture with the rest of the milk and stir to combine.
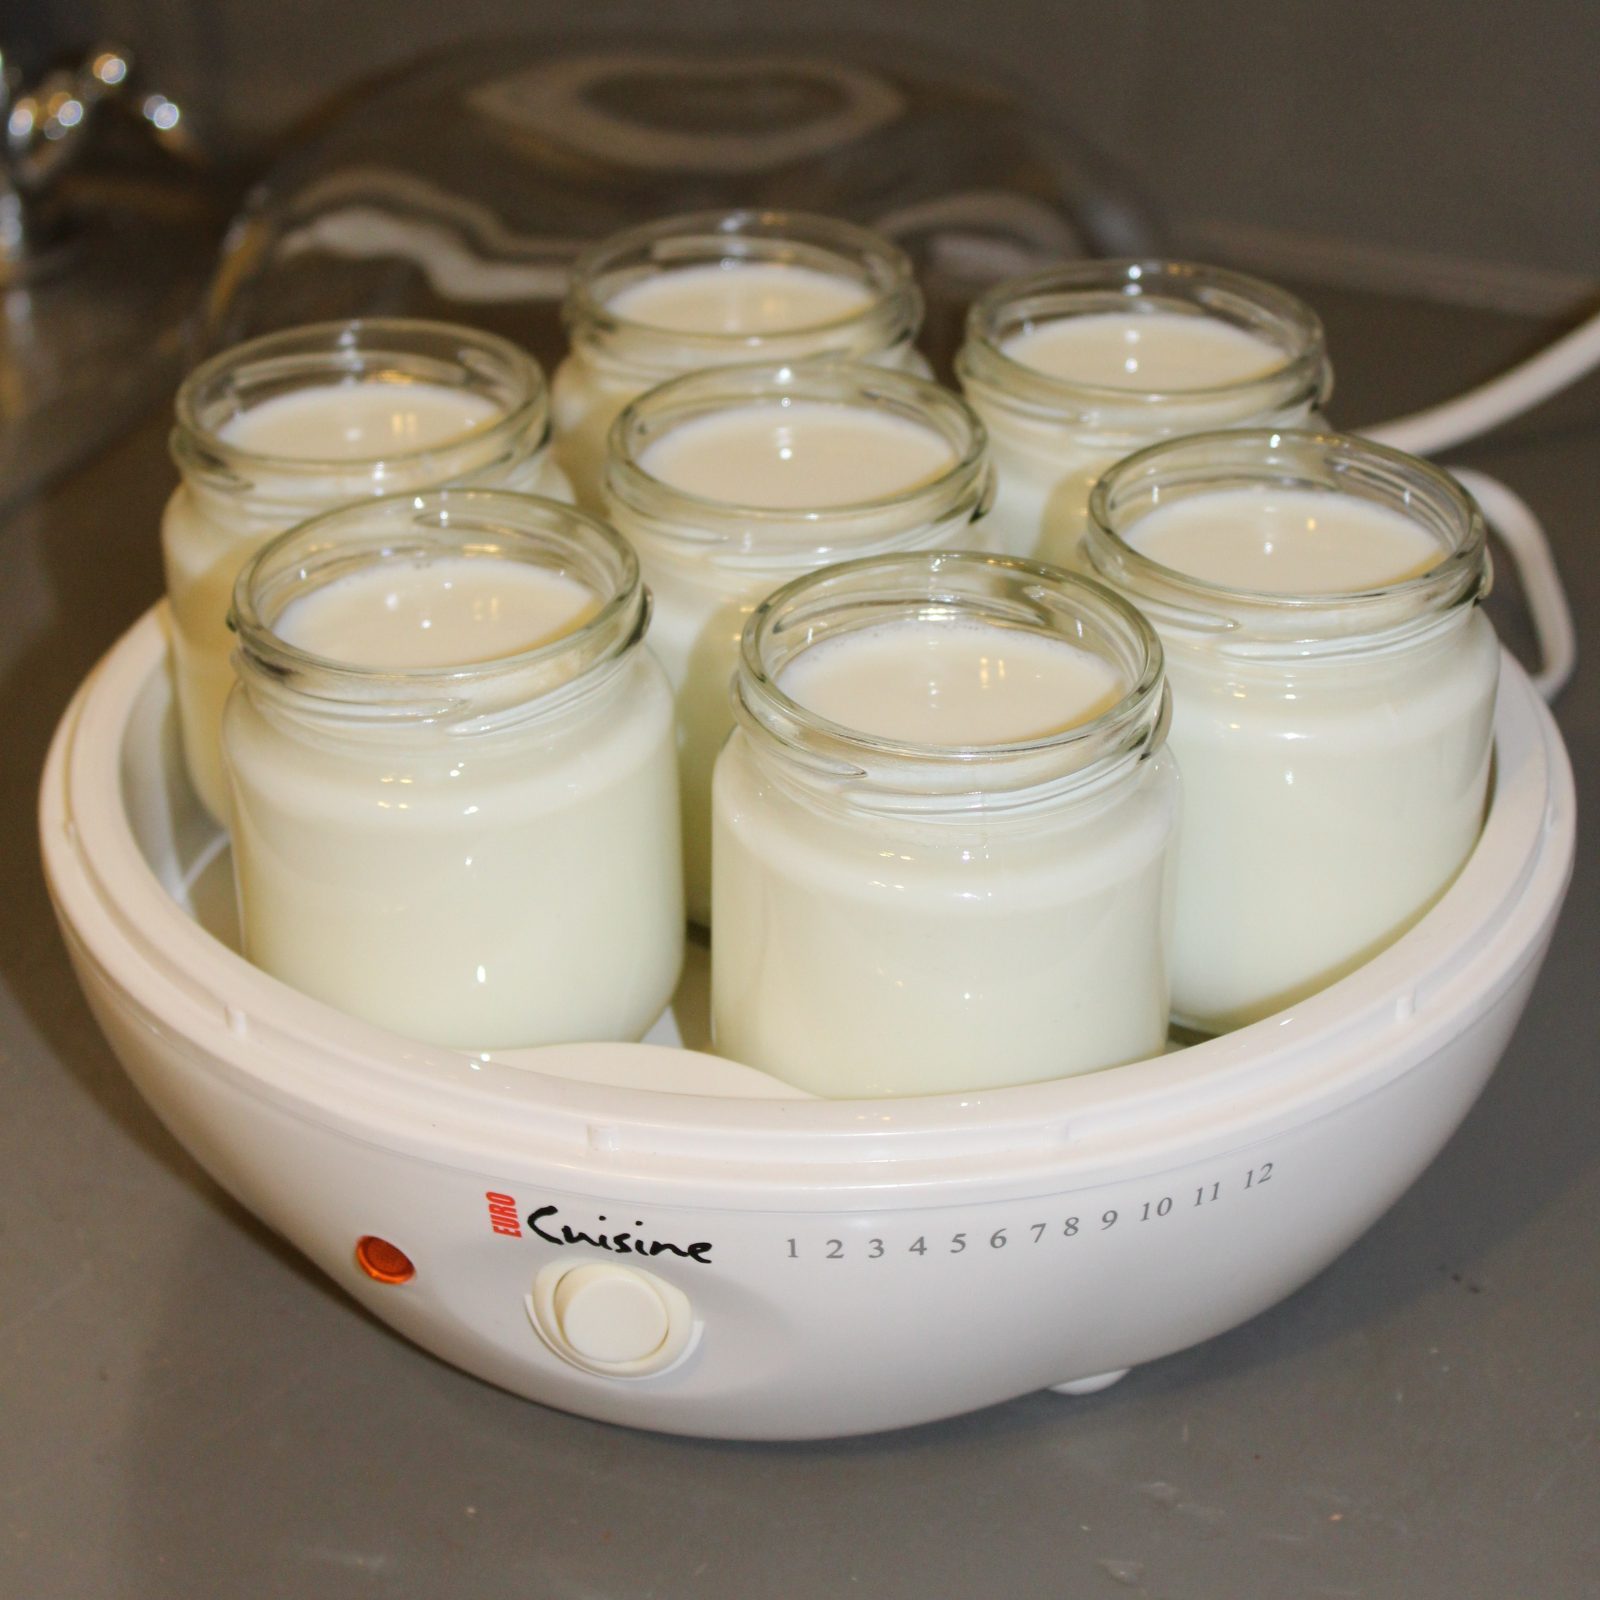
Next, you need to transfer the mixture to the glass jars. I use my glass Pyrex measuring cup to fill the individual glass jars and that works fine for me.
It is okay to fill them almost to the top as the yogurt doesn’t expand or anything as it “cooks”.
At this point, you can also add fruit or other flavorings to the yogurt. The manual provides some recipes and ideas.
The last thing is to put the jars into the yogurt maker without their lids, plug it up and wait.
The manual isn’t totally clear about how long they should stay in there, but from what I can gather the recommended time is 6 hours for whole milk, 8 hours for 2% and 10 hours for skim milk.
While there is some downtime while preparing the yogurt, it is really only about 10 minutes of active work time to make 7 servings of yogurt.
To me, it is worth the time and effort to have delicious, healthy yogurt we can eat throughout the week. I hope this helps you get started with making your own yogurt!
You might also like these posts:
- Easy Kitchen Tile Backsplash with Peel and Stick Tiles
- DIY Foaming Hand Soap Dispenser
- How To Make DIY Foaming Hand Soap
Instructions for making homemade yogurt in a yogurt machine. How to Make Homemade Yogurt

Ingredients
Instructions


I made the yogurt and it was delicious but a bit runny. Is there a secret to making it thicker?
I haven’t had that problem but maybe add a bit less milk?
Hi ,
Can use the yogurt that I make as starter for my next batch ?
Yes you can!
Hi,
Made a mistake and bought vanilla starter. Does it have to be plain? Was planning to flavor the final batch vanilla anyhow.
Thanks in advance and thanks for the easy to understand instructions!
Annette
I’ve never tried this. Not sure if the sugar in the vanilla yogurt would affect it? Worth a try anyway!
I made my first batch of yogurt using this recipe (I have the same yogurt maker) and you’re right – it’s SO good! I used a blend of 2% milk, fat free half and half, and heavy whipping cream. I used plain Greek yogurt for the starter. It took 10 hours, and the finished yogurt was amazing even before I flavored it! I did 3 with homemade mango-ginger jam, 3 with vanilla syrup, and left one unflavored to start my next batch. Your directions were perfect, thank you!
Wow your yogurt sounds amazing, Jennifer! Thanks for sharing!
Thanks so much for this recipe! The booklet that came with my yogurt maker was confusing, your directions were very clear. I will let you know how it turns out!
Great, I’m so glad it helped! I agree that the yogurt maker directions are super confusing.
Culturing the yogurt for 24 hours will make it virtually lactose free for those who are lactose intolerant or looking for a more easily digestible yogurt. The 24 hour method is recommended for those who follow the SCD OR GAPS diet. A word of warning, the longer you let the yogurt culture, the more sour it tastes! So 24 hour yogurt is quite tart!
Thanks Emily, this is really helpful information!
Hi, a friend of mine gave me a yogurt recipe almost identical to the one you ate sharing here except she said to let the yogurt set in machine for 24 hours. That is more than twice as long as the directions that come with the machine. I’ve asked her twice if she really meant to tell me 24 hours but she hasn’t answered yet. Let me know your thoughts please. 🙂 Thank You
Hi Whit! I really don’t see any reason to let the yogurt sit for 24 hours… I have no idea if it would help or hurt the yogurt. I do know that it is not necessary since I have successfully made yogurt in much less time! Hope that helps.